The Complete Guide to Shopify Conversion Tracking for Microsoft Ads
Microsoft Ads (formerly Bing Ads) is a strong alternative to Google Ads, giving advertisers access to a unique audience – often with a lower cost per click. To get real value from the platform, however, accurate conversion tracking is essential. That means tracking key actions such as purchases, add-to-carts, and checkout starts.In this practical guide, you’ll learn how to set up Microsoft Ads conversion tracking on a Shopify store using the UET (Universal Event Tracking) tag. Once implemented, your data can be used to improve performance and make smarter advertising decisions.
Why Microsoft Ads Conversion Tracking Is Important
Before getting into the setup, here’s what proper conversion tracking enables:
- Measure ROI: Identify which campaigns, ads, and keywords generate sales.
- Optimize Campaigns: Allow Microsoft Ads to optimize bids based on real conversion data.
- Track the Customer Journey: Monitor important events like product views and add-to-cart actions.
- Reach a New Audience: Use the Microsoft Audience Network more effectively.
What You’ll Need Before You Start
- A live Shopify store
- An active Microsoft Ads account
- Marketing & Analytics access in your Shopify admin
Step-by-Step: Adding the Microsoft Ads UET Tag to Shopify
Follow the steps below to ensure your tracking is set up correctly.
Step 1: Create a UET Tag in Microsoft Ads
- Log in to your Microsoft Advertising account.
- From the top menu, go to Tools → Conversion Tracking.
- In the UET tags section, click Create UET tag.
- Name your tag (for example, UET).
- (Optional) You can enable Microsoft Clarity, but it’s not required for conversion tracking.
- Click Save and next.
- Choose Install the tag yourself, then click Next and Done.
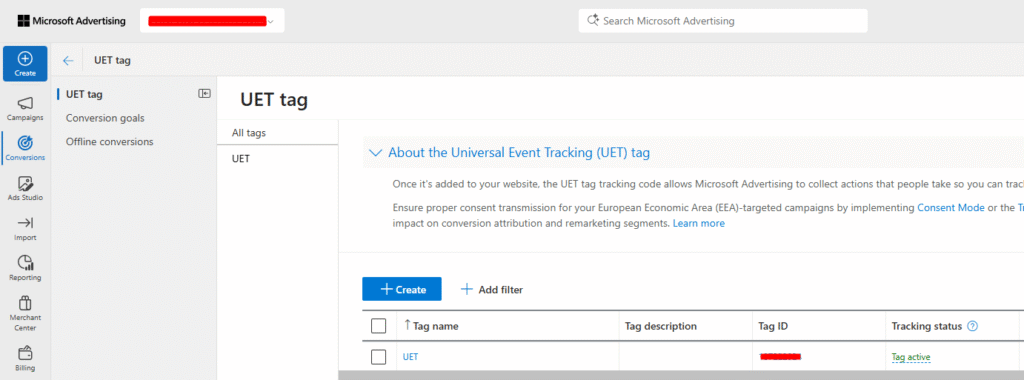
Important: Copy and save the Tag ID shown on the confirmation screen—you’ll need it later.
Step 2: Create a Custom Pixel in Shopify
- In your Shopify admin, go to Settings → Customer Events.
- Click “Add Custom Pixel” in the top right
- Paste the following script into the editor
- Name this pixel (e.g., “Microsoft Ads Tracking”) and click Add pixel.
// Load Bing/Microsoft Ads UET script and trigger initial page load tracking
(function(w,d,t,r,u){
    var f,n,i;
    w[u]=w[u]||[];
    f=function(){
        var o={ti: "INSERT_UET_TAG_ID", enableAutoSpaTracking: true,
              consent: "granted" };
        o.q = w[u]; w[u] = new UET(o); w[u].push("pageLoad");
    };
    n = d.createElement(t); n.src = r; n.async = 1;
    n.onload = n.onreadystatechange = function(){
        var s = this.readyState;
        if(s && s !== "loaded" && s !== "complete") return;
        f(); n.onload = n.onreadystatechange = null;
    };
    i = d.getElementsByTagName(t)[0];
    i.parentNode.insertBefore(n, i);
})(window, document, "script", "https://bat.bing.com/bat.js", "uetq");

// Subscribe to events and send Bing UET custom events
analytics.subscribe("page_viewed", () => {
    // Bing UET auto-tracks page views, so no extra code needed.
});

analytics.subscribe("product_added_to_cart", (event) => {
    // Ensure Bing's global UET queue exists
    window.uetq = window.uetq || [];
    window.uetq.push('event', 'add_to_cart', {
        "content_category": event.data.cartLine.merchandise.product.productType || "Uncategorized",
        "content_ids": [event.data.cartLine.merchandise.product.id],
        "content_name": event.data.cartLine.merchandise.product.title,
        "currency": event.data.cartLine.merchandise.price.currencyCode,
        "value": event.data.cartLine.merchandise.price.amount,
        "quantity": event.data.cartLine.quantity
    });
});

analytics.subscribe("checkout_completed", (event) => {
    // Ensure Bing's global UET queue exists
    window.uetq = window.uetq || [];
    window.uetq.push('event', 'purchase', {
        "transaction_id": event.data.checkout.order.id,
        "currency": event.data.checkout.currencyCode,
        "revenue_value": event.data.checkout.totalPrice.amount,
        "content_ids": event.data.checkout.lineItems.map(item => item.variant.product.id),
        "content_name": event.data.checkout.lineItems.map(item => item.variant.product.title).join(', '),
        "quantity": event.data.checkout.lineItems.reduce((sum, item) => sum + item.quantity, 0)
    });
});
5. Replace “INSERT_UET_TAG_ID" with your actual ID from Step 1.
6. Click Save.
Step 3: Connect Pixel
In Customer Events, find your Microsoft Ads pixel and click Connect.
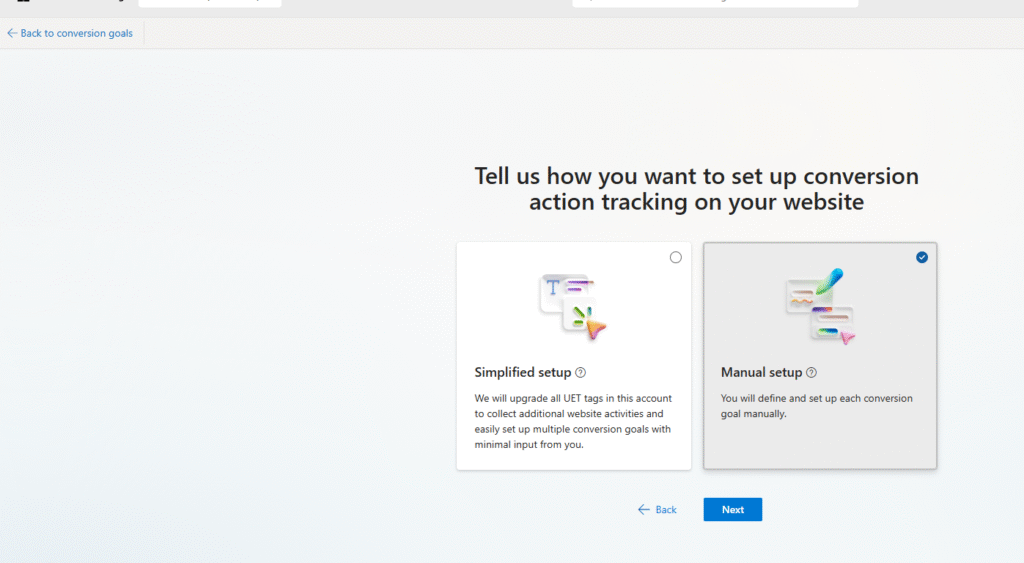
Step 4: Create a Conversion Goal in Microsoft Ads
You’ll define what kind of event Microsoft should consider a conversion (e.g. a purchase).
- In your Microsoft Ads account, go to:
Tools → Conversions → Goals - Click Create to set up a new goal
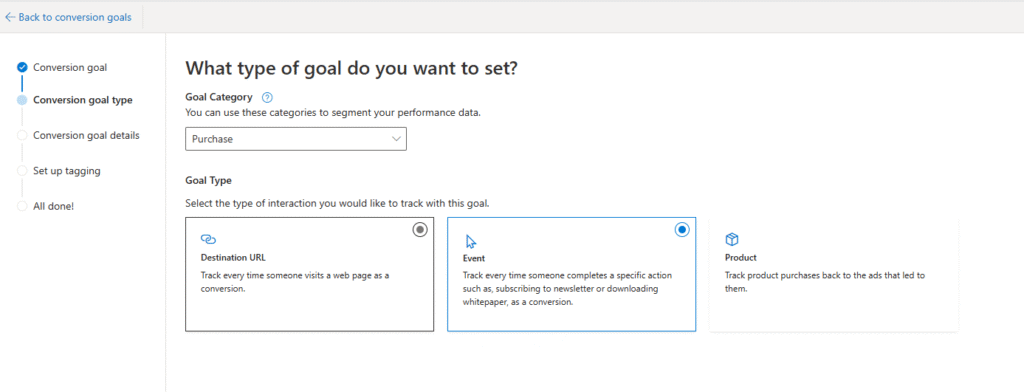
- Choose the following settings:
- Goal Type: Website
- Goal Category: Purchase
- Goal Type: Event Goal

Choose manual setup.
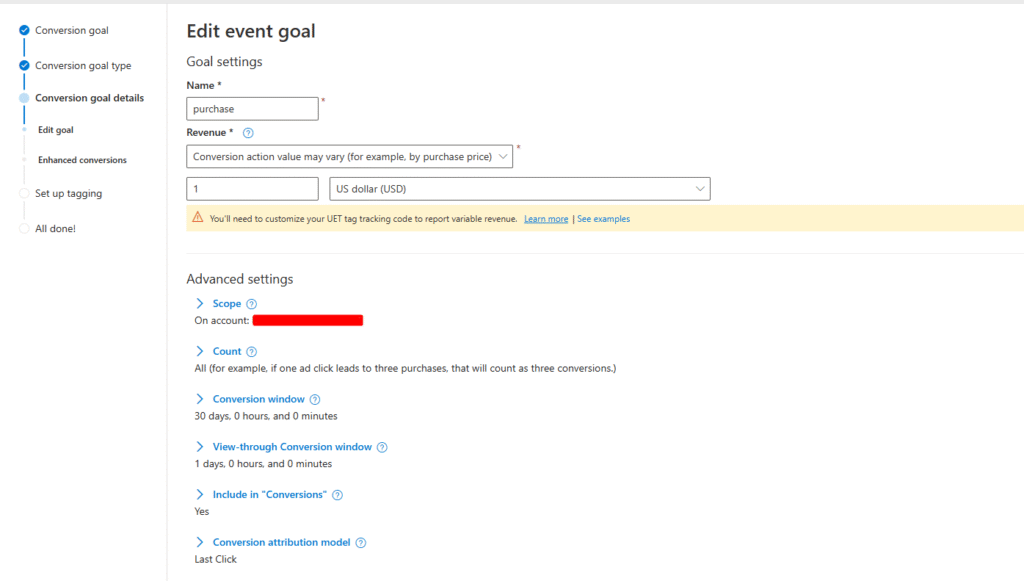
Select Website event and set the event goal to Purchase. As the goal type, choose Event Goal, as shown below.
Next, configure your settings as follows.
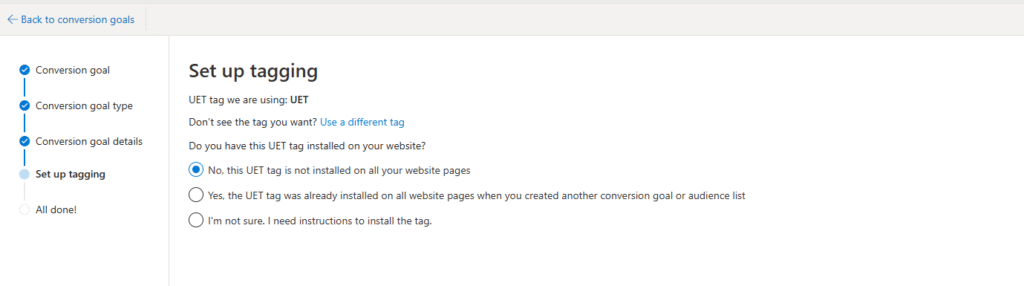
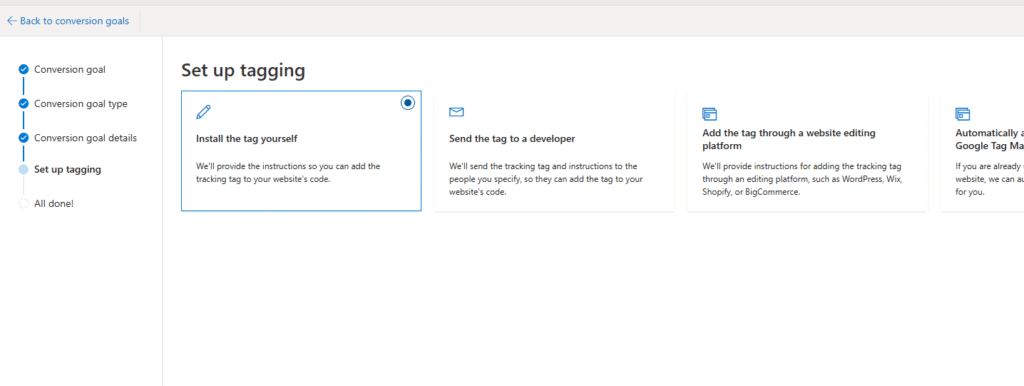
Then click “Install the tag yourself.”
Click Save.
What to Do Next
Data may take 24–48 hours to fully appear in Microsoft Ads. Once it does, you can:
- Create conversion goals for purchases using your UET tag
- Analyze performance to identify top-performing campaigns
- Enable smart bidding strategies like Target CPA or Target ROAS to automate optimization
With accurate tracking in place, Microsoft Ads can become a reliable and scalable acquisition channel for your Shopify store.
If you need any further help with Microsoft Ads and Shopify tracking, feel free to contact us – the Excella PPC team will be happy to assist you.